Depending on the type of program you are running, there are multiple ways to import raters. Ask us for more information about which program type is right for your survey.
If you are running a program where the participant nominates through a survey, you will see the edit icon ( ) in the participant nomination table on the main status screen - clicking this will take you to their nomination survey and you can edit the raters from there on behalf of the participant. To remove a rater, simply delete their email address and submit - the system will remove the name and email from the program completely.
If you are running a program where the user can nominate raters through the portal and requires manager approval, you have two options. You can click on the participants name (highlighted in blue) on the status screen and be taken to their portal, where you can add the raters for the manager to approve - you can then do the same and log in as the manager if required, to 'approve all' in bulk; you can also approve the raters individually from the admin status screen (the rater status table at the bottom of the page). You can also ask us to enable administrator rater editing - if you add raters here, either individually or by upload, they will automatically be added in as approved.
If you are running any other program where administrator rater editing is enabled, you can simply go to the 'Manage Raters' screen:
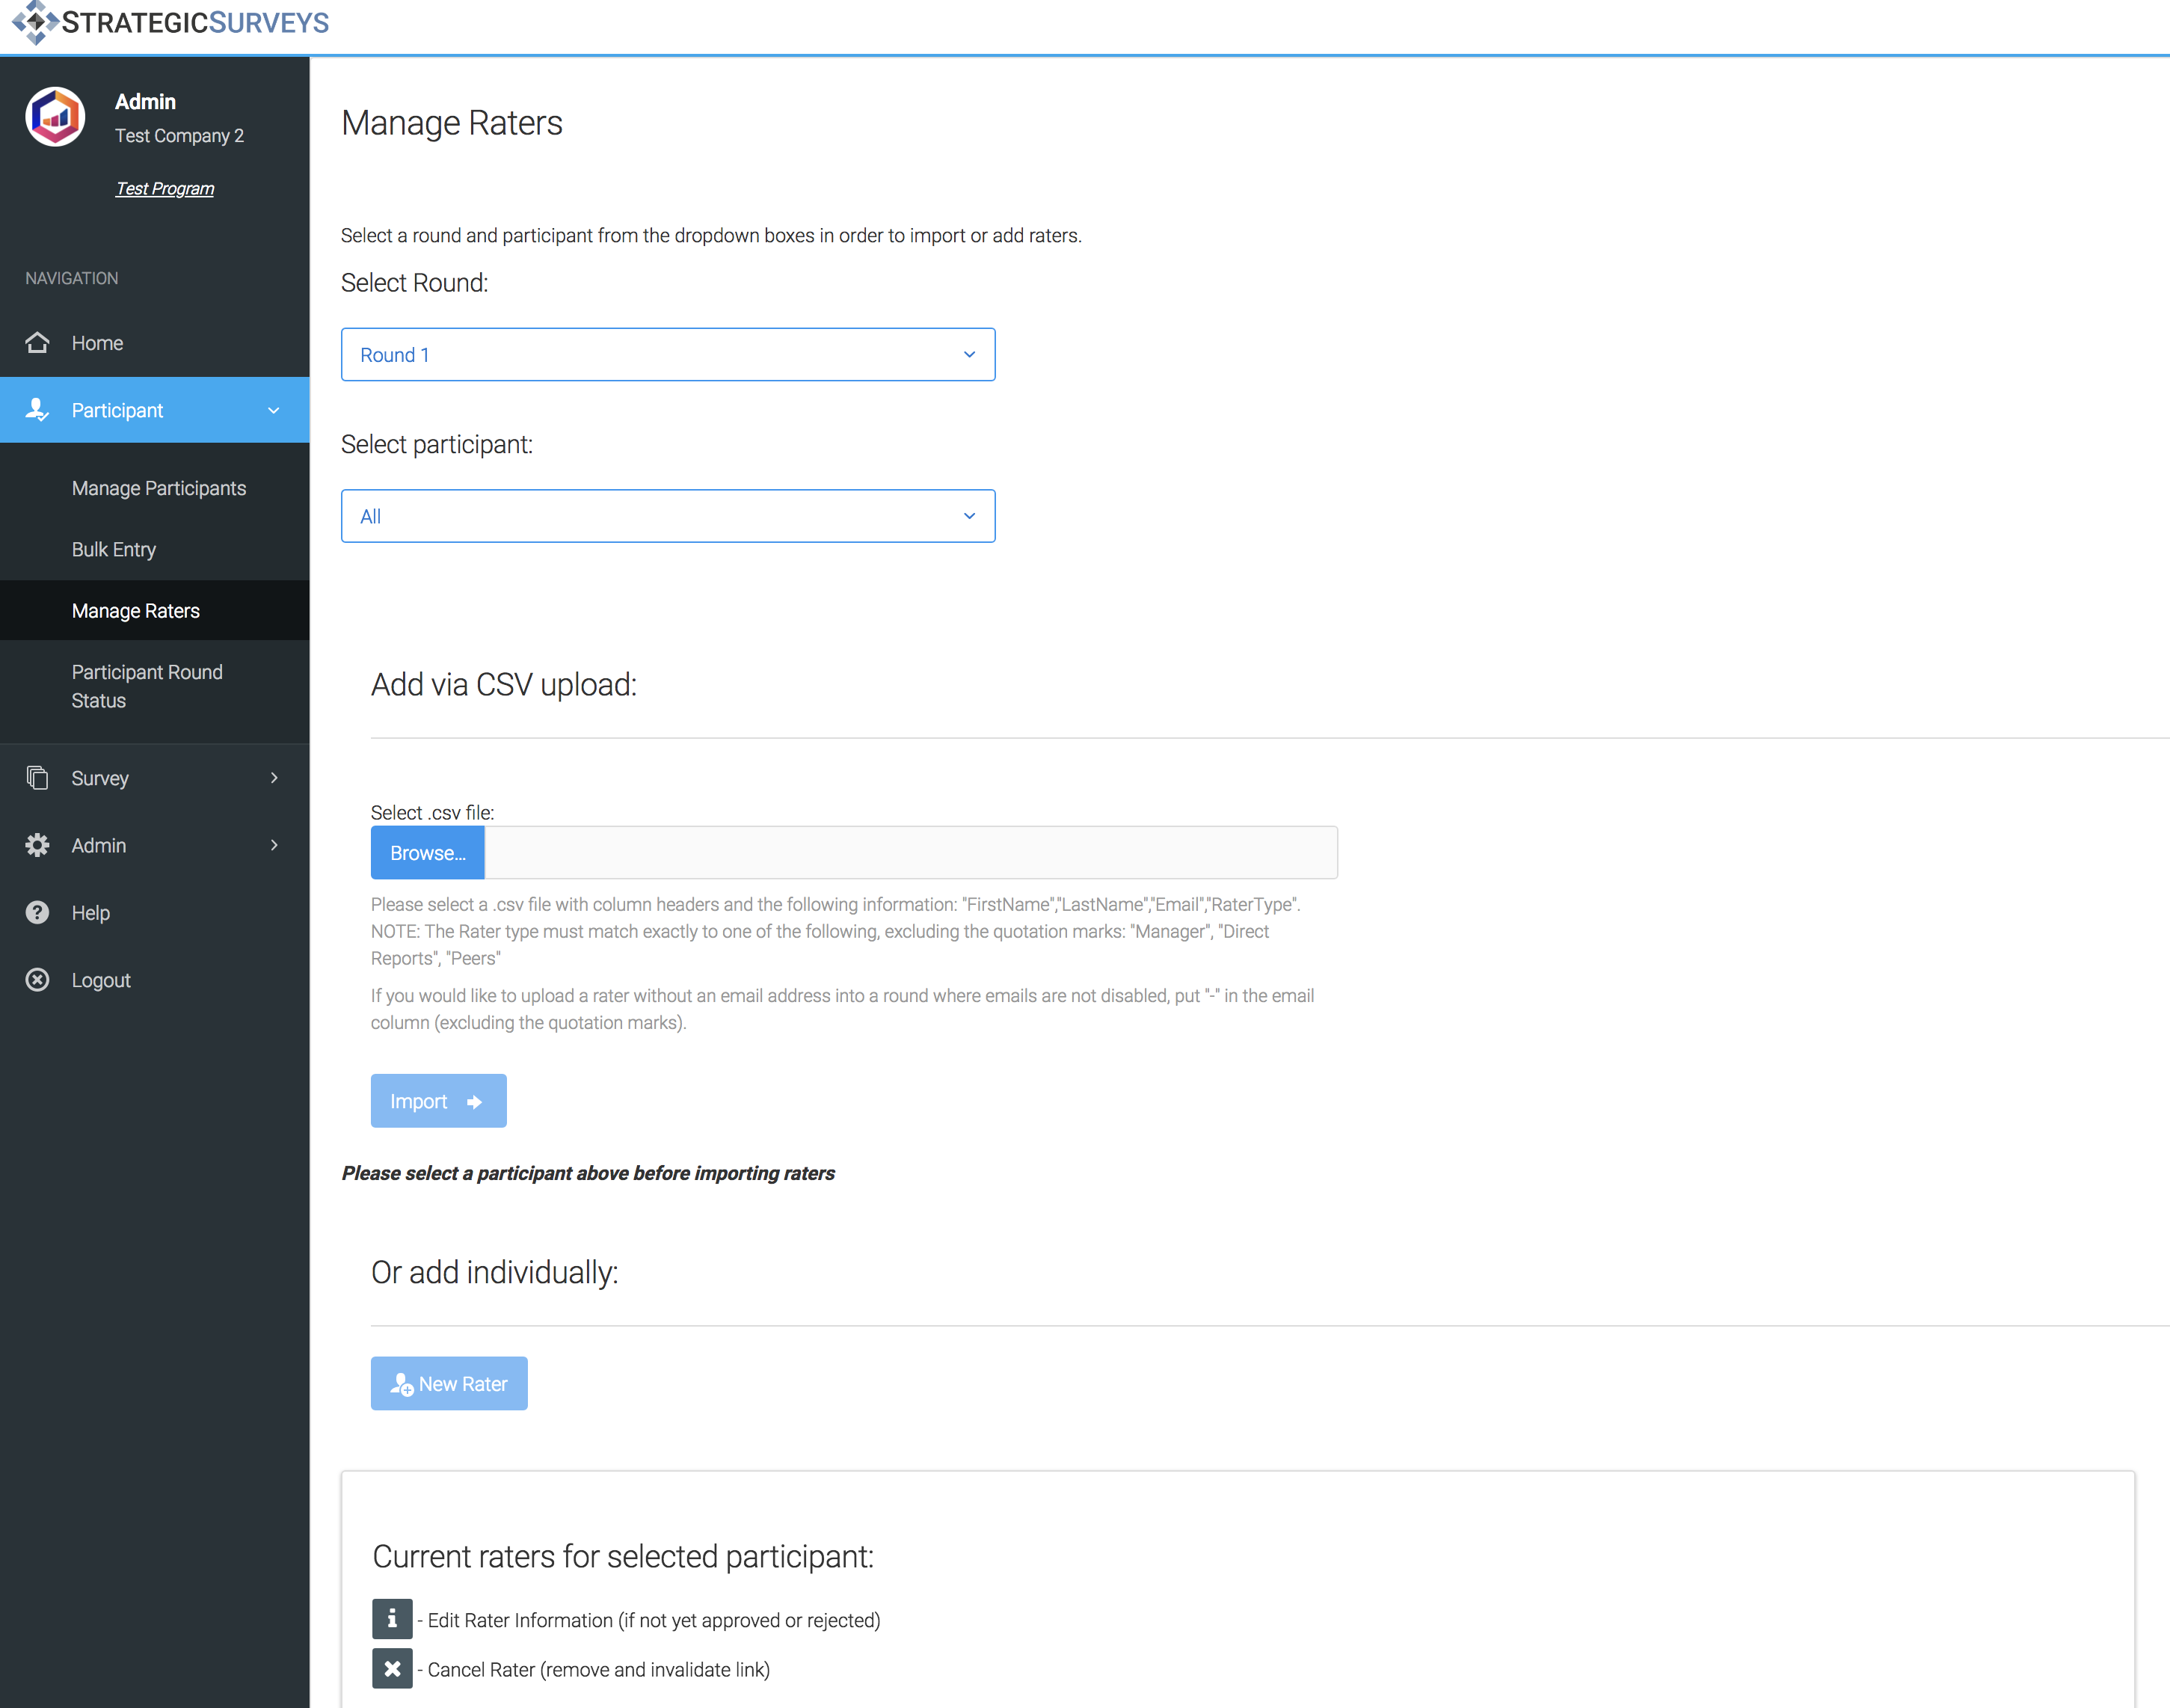
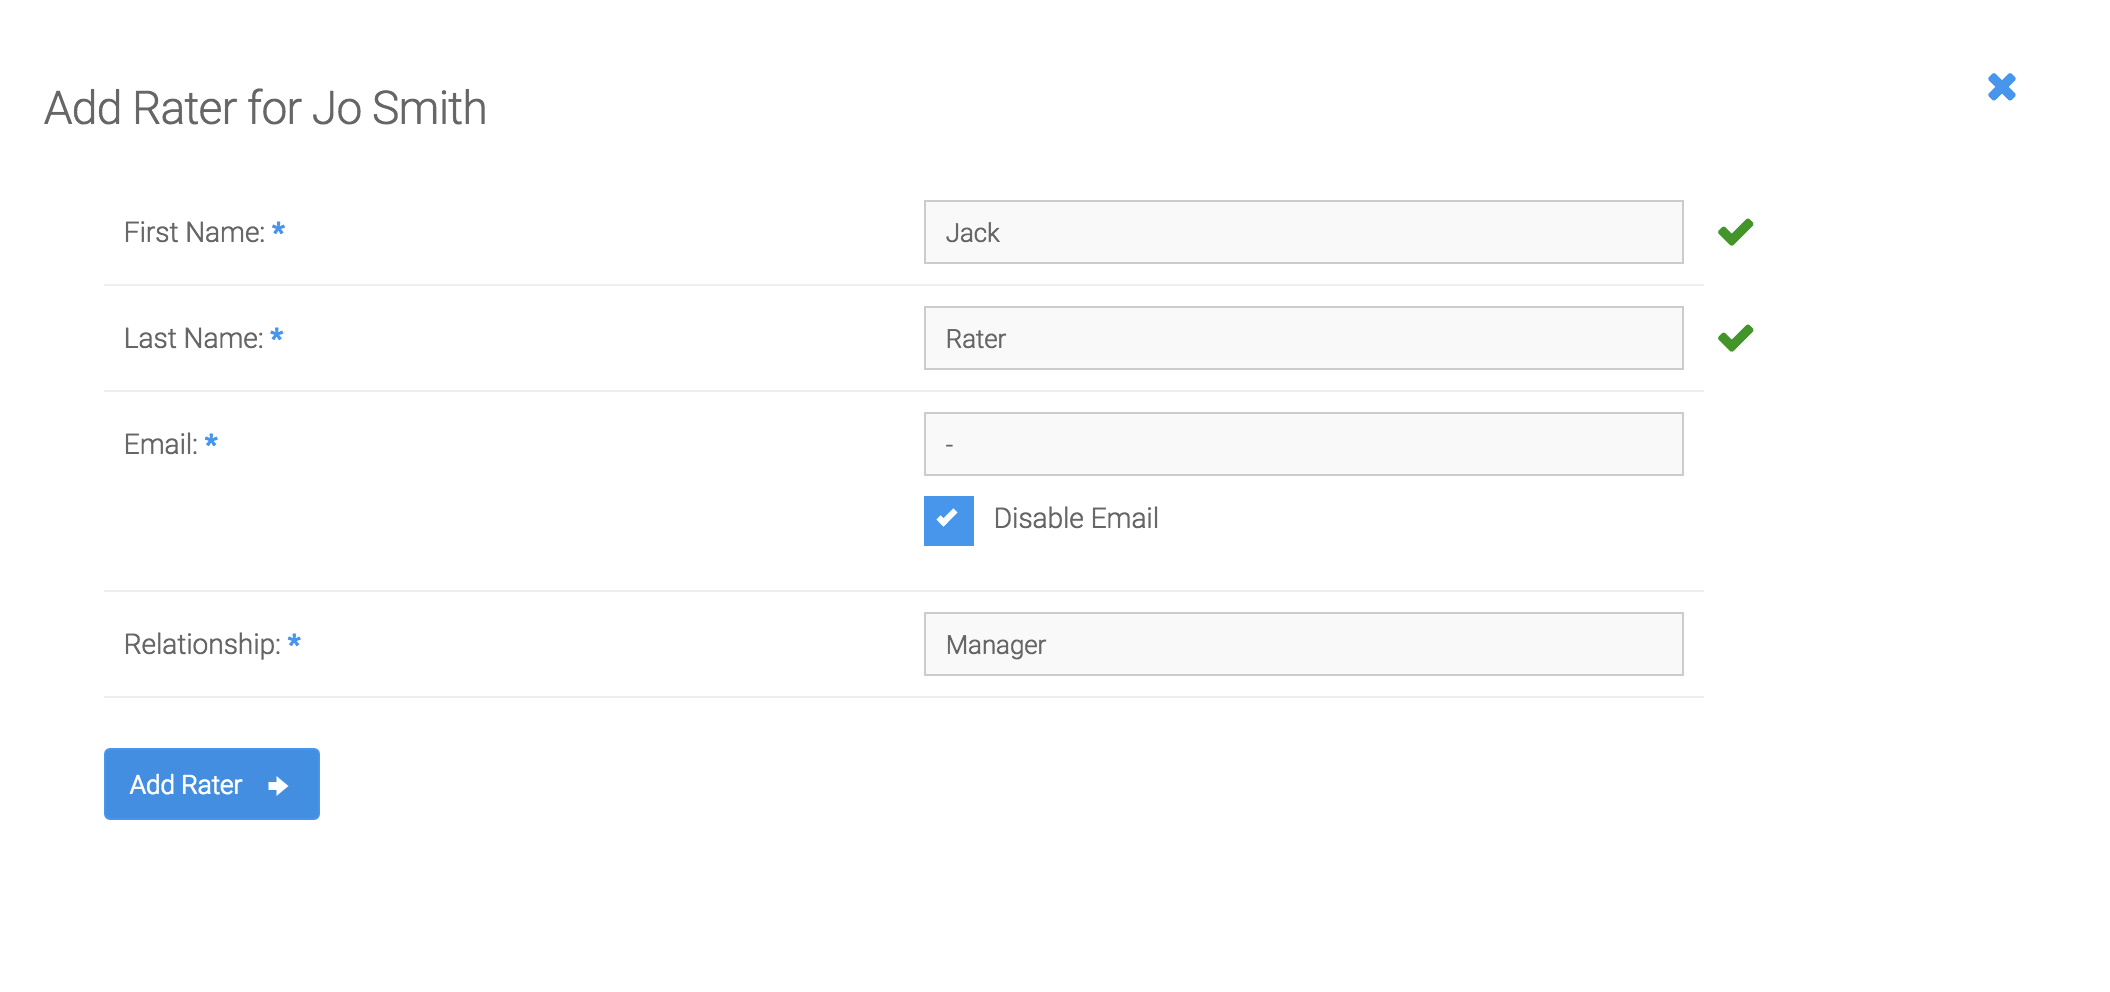
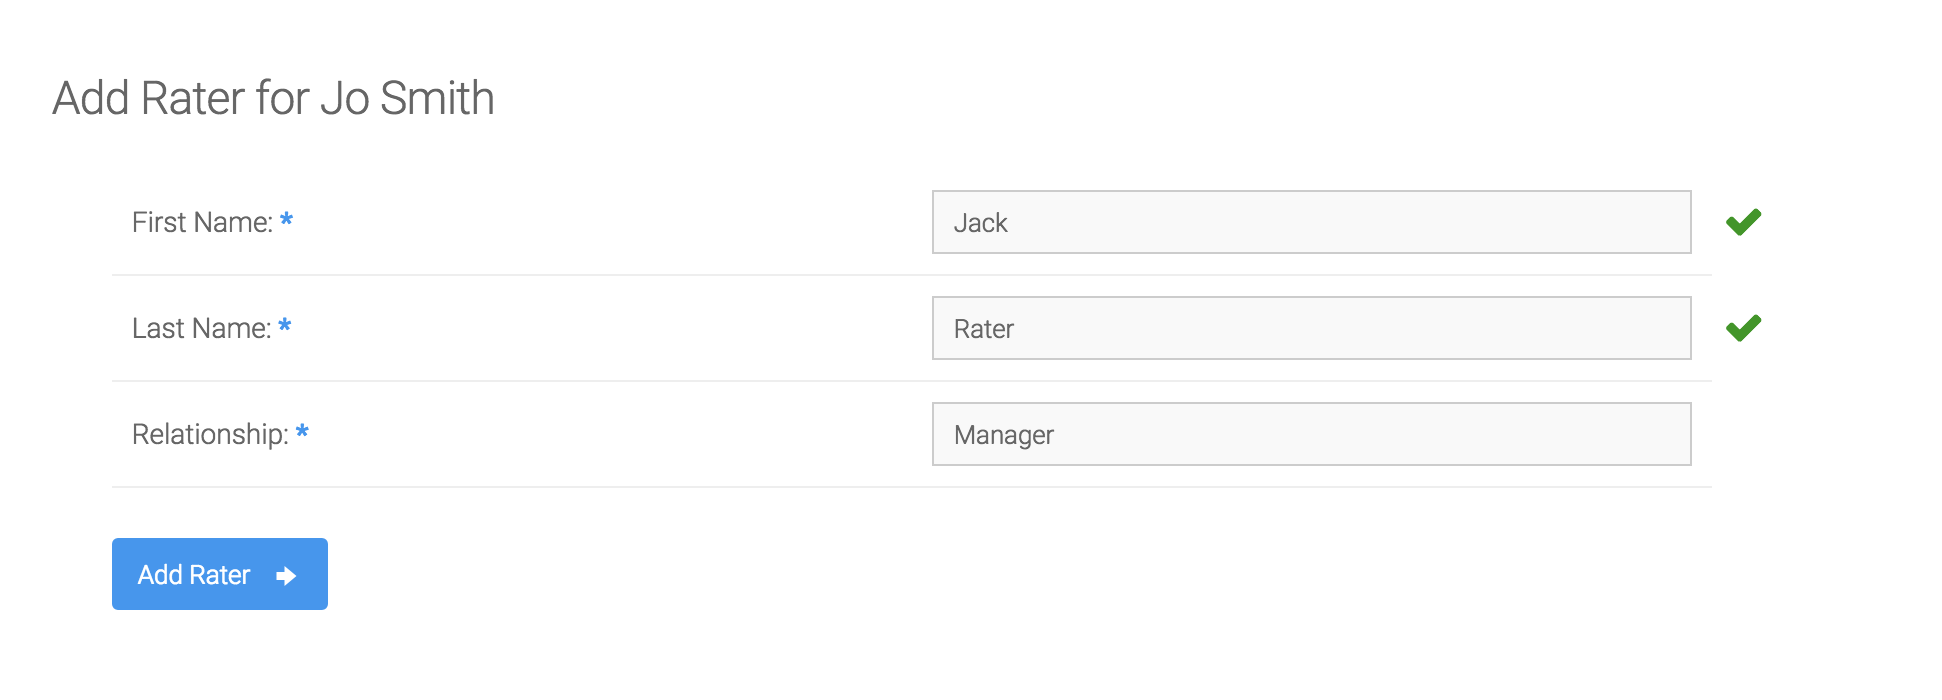
Here you can import via csv, similar to the participant import screen, or click 'New Rater' and add individually. You will need to select a participant from the drop down first in order to add raters by either method.
The instructions below the file select will tell you exactly what columns you need in the csv in order for the system to accept the file. If you are running a round without email addresses, the instructions will not include the email field. If you have previously asked us to allow optional disabling of emails, you will still need the email field but can enter an email placeholder for raters with no address (see the instructions on the page for the exact placeholder, it will depend on your system).
To add individually, you will need to fill out the name and email (if not optional). If email is disabled, the field will not appear - if email is optional, you can click the 'disable email' checkbox to enter the email placeholder.